If your hard drive failed right now, how much information would you lose? If you got a new computer, how long would it take you to get all your apps up to par with your workflow? When was the last time you wanted to show a photo on your phone to a friend only to realize you backed it up and deleted it to free-up space?
With cloud storage services like Dropbox, Box, Google Drive, or others, self-contained computing can be—and should be—a thing of the past. With the help of one of these services, you can set up a seamless cross-computer syncing workflow and a set-it-and-forget-it computer backup that will also be easily accessible from your phone or any computer.
What You’ll Need
- You’ll need a cloud storage solution. I’ll use Dropbox as an example since that’s the most popular. You may need a paid account for your cloud service if you choose to use it as a backup solution.
- You’ll need to generate symlinks. A symlink, or symbolic link, is similar to an alias or shortcut, but different. We’ve all made shortcuts to a file or an app before. To us, it’s essentially the same as clicking the real file, folder, or app—but to the computer, they’re two separate entities. A symlink is similar to an alias or shortcut in that it opens the file it’s pointing to, but the computer (and therefore all apps) doesn’t recognize them as two entities, but rather one. Editing, moving, or deleting a symlink won’t have any adverse effect on the original file, much like an alias or shortcut.
- You’ll need to download and install SymbolicLinker if you’re on a Mac. If you’re on Windows, this article may help you get set up.
- You’ll need to access your Application Support folder, found in ~/Library/Application Support/ on a Mac (on a PC, it’s the AppData folder). Tread lightly here, this is where apps store most of their information, and accidentally deleting or moving something can have adverse effects.
Set Up Your First App to Sync Information
Note: be aware that this article is written for Mac-to-Mac syncing and has not been tested on Mac-to-Windows or Windows-to-Windows, so I suggest taking precautions if you are not the technical type.
Step 1) Set Up the Folder Structure
The first thing you want to do is set up your preferred folder structure for syncing files across computers. Since Dropbox keeps watch over one main folder, everything lives inside my Dropbox folder. At the top level, I have a Shared folder that contains all files I share with others or sync to other computers.
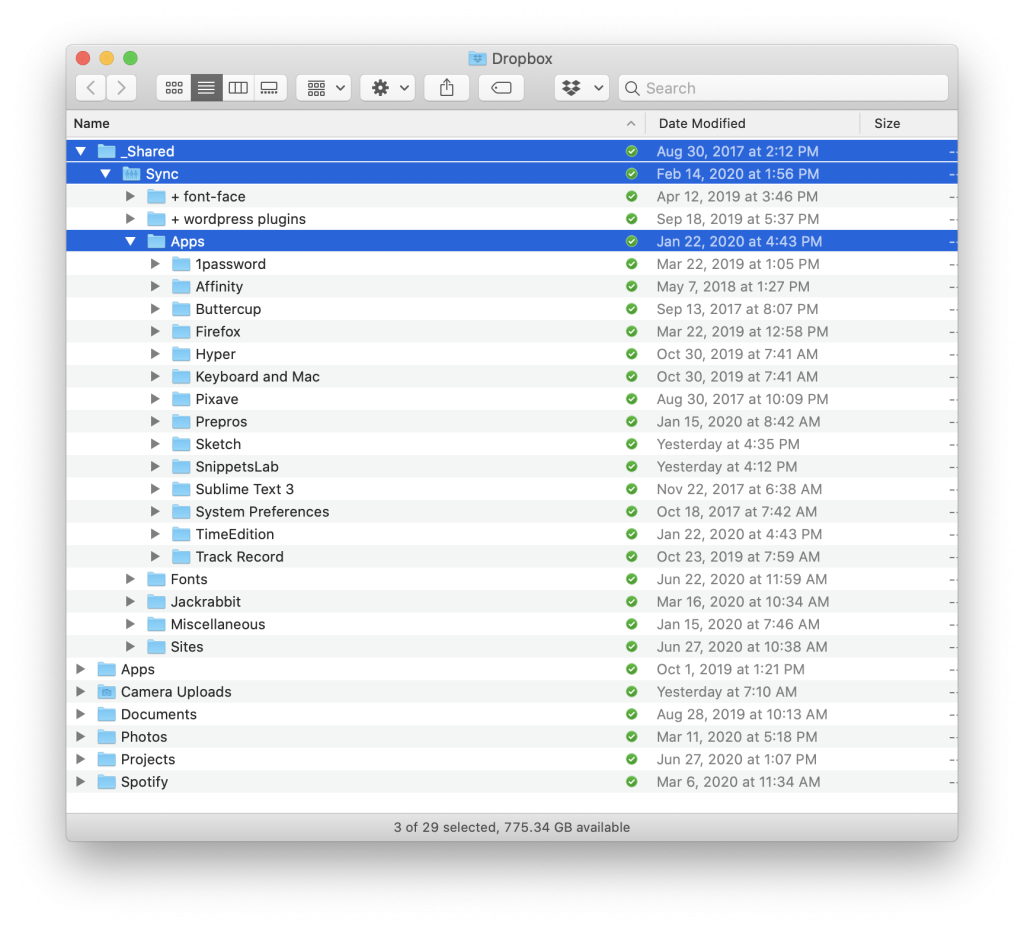
In the Shared folder, I set my Sync folder to contain all files I sync across all my Macs. Under Sync, I have an Apps folder that contains a folder for each app whose settings and resources I sync.
It’s important that this will be the final resting place for all synced app data, since modifying the location or name will render the syncing process obsolete and require re-synced apps.
Step 2) Move and Sync App Resources
There are a few different ways of syncing apps. Some desktop apps have a web interface, like a to-do list or Spotify, and syncing is automatic. Some apps allow you to specify a location for its database or library under that app’s preferences, or by holding the Option key while opening the app, like a photo gallery app or other database-powered apps. Other apps are just self-contained and don’t offer any specific locations for resources.
For the apps that are auto-synced, there is no work to be done. For the apps that offer a library or database location, create a folder within your newly-created Apps folder and store it there.
For the apps that are self-contained, this is where the Application Support folder and symlink come in:
- Quit all apps you wish to sync, make sure Dropbox or your cloud service is set up and running, and make sure SymbolicLinker is installed.
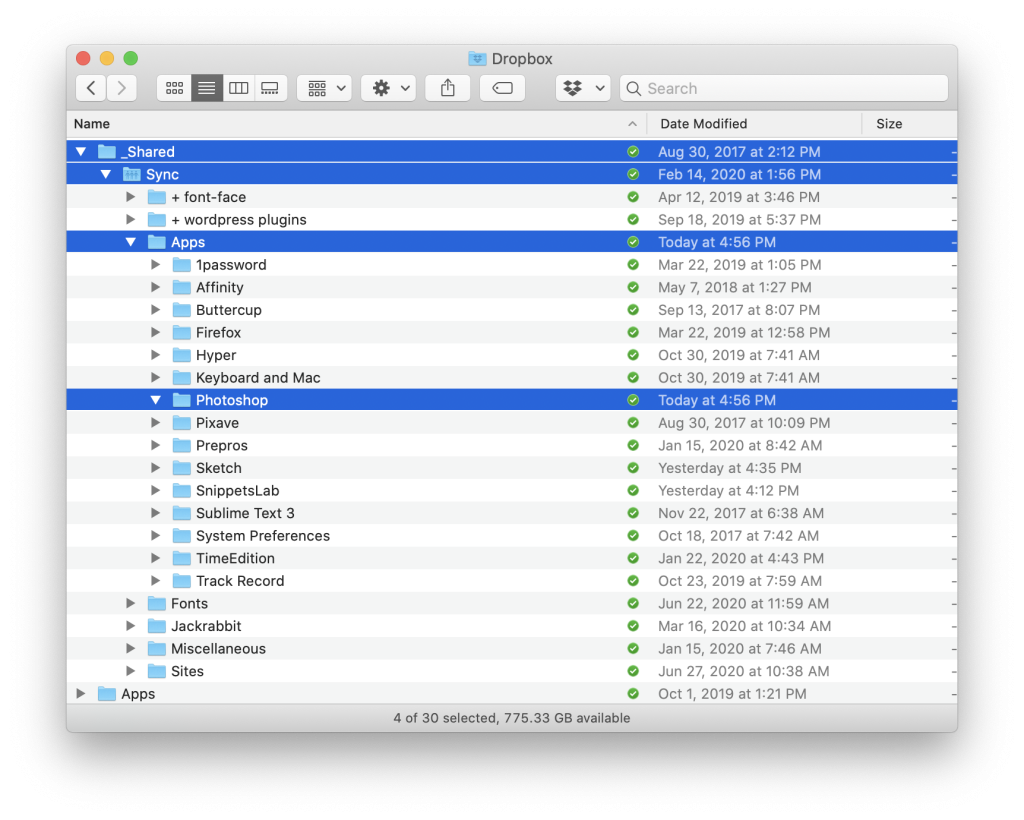
- Create a folder within the Apps syncing folder for the app you wish to sync. For this example, I’ll use Photoshop.
- Within your Application Support folder, find and open the folder of the app you wish to sync resources for, note that it’s not always named the same name as the app.
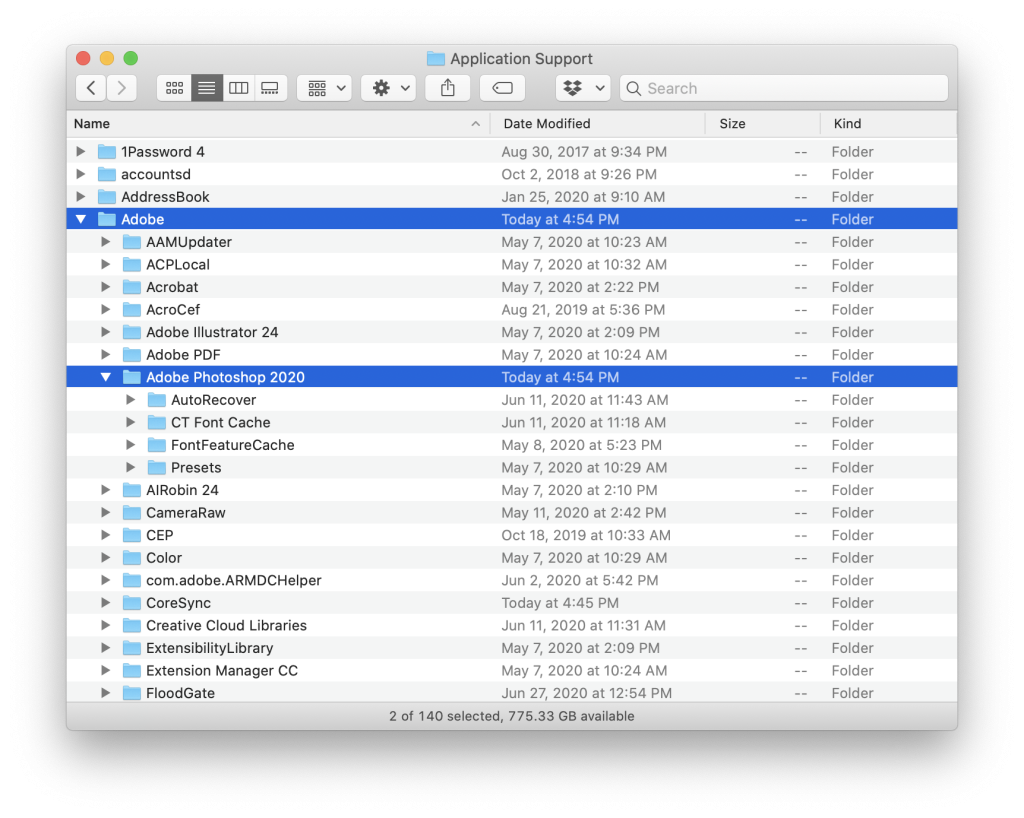
- Find the files or folders you need to sync. Select them and drag them to the corresponding folder in the Apps syncing folder. You will most likely need only one folder or set of files to sync over. In my Photoshop example, I’m only concerned about the Presets folder.
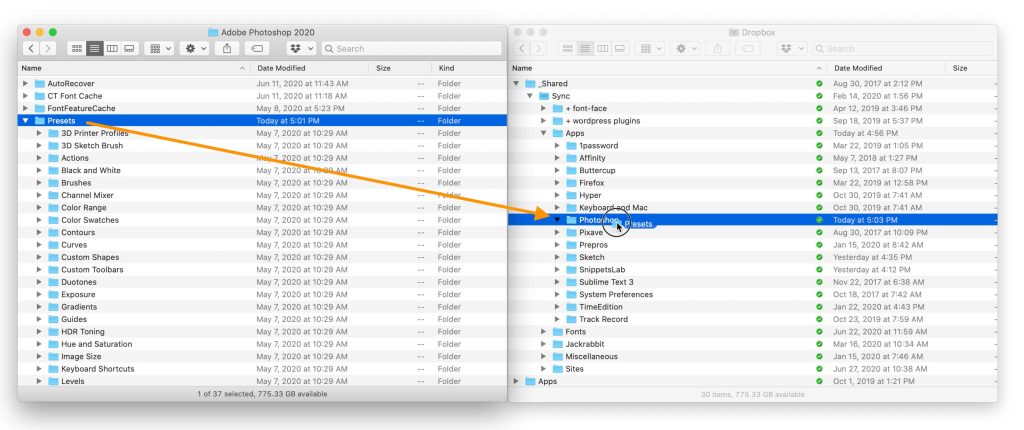
- Once all files and folders have been moved over, right-click the file, folder, or directory and select Services > Make Symbolic Link.

- Drag the newly created symlink file to the former location of the files you moved.
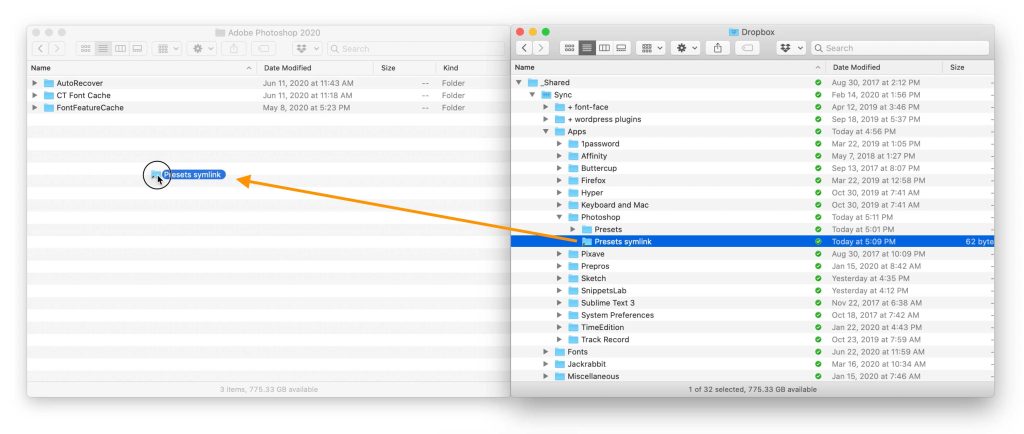
Be sure to change the name of the symlink to match the file, folder, or directory it is pointing to exactly. Open the app to make sure everything works correctly and as expected. If so, repeat with all other apps you need to sync.
Step 3) Secondary Computer Setup
Now it’s time to set up the second computer:
- On the second computer you wish to sync with, make sure Dropbox is installed and set up correctly. All files will auto-download.
- Once all files are downloaded, download and install Symbolic Linker.
- Quit all apps you wish to sync.
- Find the files or folders under the Application Support folder that should be synced and drag these to a folder on your desktop for safekeeping.
- Repeat steps 5 and 6 above. Open the app to make sure everything works correctly and as expected. If so, the app is now set to sync cross-computer and you can trash the files you stored on your desktop.
- Repeat as needed for each additional app.
Setting Up a Backup Solution
For all other “traditional” files that you would store in your computer’s home folder or desktop, like photos, PDFs, Word documents, etc, simply move to an appropriate directory under Dropbox. Mobile apps for cloud storage services have decent document and photo viewing, so you’ll have all your files and photos with you wherever you are.
Pro tip 1: Un-Sync Folders
With Dropbox, you can un-sync whole folders. If you know you don’t need files anymore but need to free up space on your computer, you can un-sync a folder. It will disappear from your hard drive, but all files will still exist on dropbox.com. For example, if you’ve made the jump to Spotify, but you don’t need nor want to delete your mp3s from the iTunes days, you can migrate your music library following the steps above and un-sync the folder. It will remove all mp3s from your computer and store them solely in the cloud, ready to access as needed.
Pro tip 2: Quick File Sharing
You can easily share a file by right-clicking and selecting “Copy Dropbox Link”. No need to upload or email the file since it is already in the cloud—you just share the link.
And with that, you have a set-it-and-forget-it cross-computer automatic backup solution that reduces fears of a failed hard drive, and easy remote access to all your data.